
In this tip:
- A)# Introduction
- B)# Replanting (replanting tube with inner tube)
- C)# Making replanting tube with inner tube
- D)# Final remarks
Description of a very useful replanting tube.
.
A)# Introduction
Plants are often sown in a group or in a row. When plants are bigger they are replanted to another spot in the garden. Replanting doesn’t always go well:
- During replanting, much soil drops from the roots. The plant is put in the soil with little adherent original soil and must get used to the new soil.
- It can take many days before the roots of the plant absorbs water and nutrition. Until that time, the plant has drooping leaves.
Better: Try to replant with much garden earth at the roots, so with a big root ball. After replanting, the roots of the plant are still in the original soil. Plants will not hang loosely for a long time and they will grow on soon.
This tip describes replanting with much adherent soil.
.
Bulb planter
To replant plants with root ball you can use a bulb planter:
- Use the bulb planter to make a plant hole at the new spot in your garden.
- Put the bulb planter over (around) the plant.
- Push the bulb planter into the soil.
- Lift bulb planter with plant and root ball.
- Put bulb planter with plant into the new plant hole.
- Open the bulb planter and lift it from the new plant hole.
- The plant with root ball will remain in the plant hole.
.
Occasionally replanting using a bulb planter is not going well;
- During “grabbing”, the plant is damaged in the bulb planter
- During placing in the new plant hole, the plant remains in the bulb planter. Squeeze the handle or shake the tool to release the plant.
.
Two tubes
You better use a “plant hole tube” and a “replanting tube” when replanting. Very handy at cabbages, winter carrots, beetroots, leeks or lettuce (tried by myself).
.
Use thin-walled tubes; they are easily to push into the garden soil.
.
First design (with hose):
Remark: in this tip, “centimeters” is abbreviated to “cm”, “millimeters” is abbreviated to “mm”.
My first design replanting tube had a plastic hose to blow out the root ball. Replanting is done as follows:
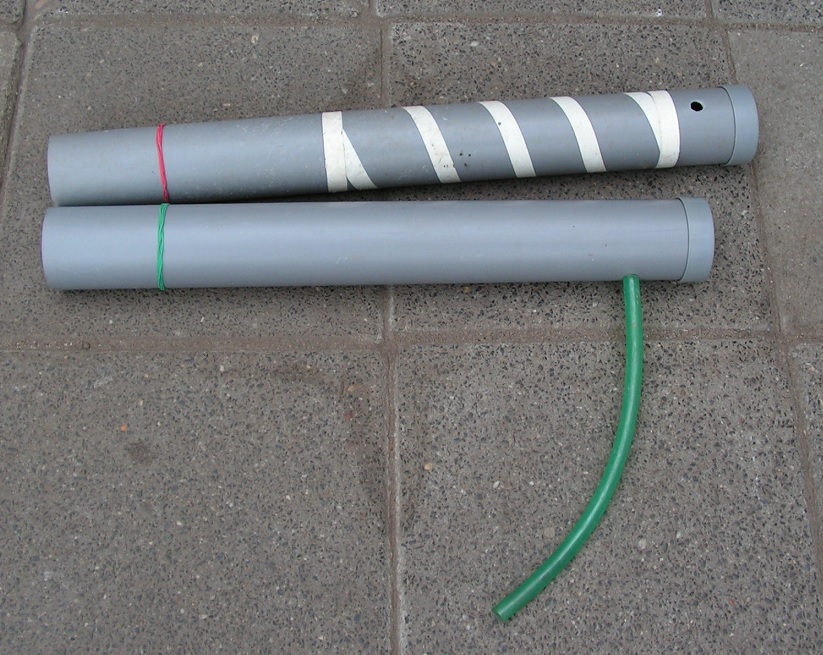
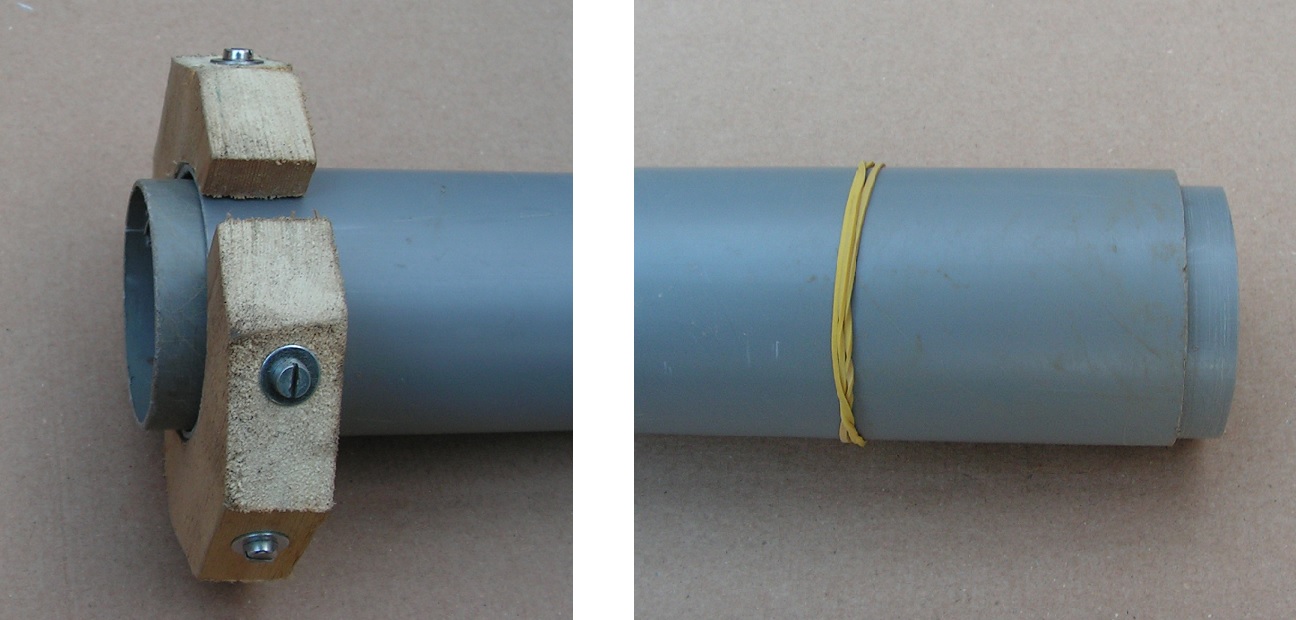
- Each tube has an elastic band; this is how deep the tube is pushed in the soil.
- Use the tube (with white tape) to make a new planting hole.
- Put the tube (with hose) over the plant and push the tube into the soil.
- Pull the tube (with hose) with plant in, out of the soil.
- Put the tube (with hose) with plant in, in the new planting hole.
- Blow on the hose while lifting the tube (with hose); the plant is blown out of the tube and remains in the planting hole in the soil.
Remark:

- There’s a lid on the plant hole tube. Press on this lid when pushing the plant hole tube in the soil; pressing on the sharp tube edge is painful, pushing on the lid is not.
- Under the lid there is an air hole in the tube to have the soil easily go in or go out of the tube.
.
This procedure works well. But….
- Blowing out the root ball with plant goes well up to 6 cm (2 3/8 inch) root ball diameter. Bigger is not possible.
- The root ball and the inside of the tube must be moist. Blowing out dry is not possible.
.
New design (with inner tube)
My new design consists of an outer tube with handles and an inner tube. The inner tube is somewhat longer than the outer tube.

The outer tube (above) and the inner tube (below), next to each other
The inner tube pushed in the outer tube.
Replanting is similar to my first design, except blowing out the root ball. The inner tube pushes the root ball with plant out of the outer tube. The root ball with plant remains in the planting hole.
This procedure works well, even with tubes up to 10 cm (4 inch) in diameter.
.
You can also use the replant tubes to make round planting holes in the soil.
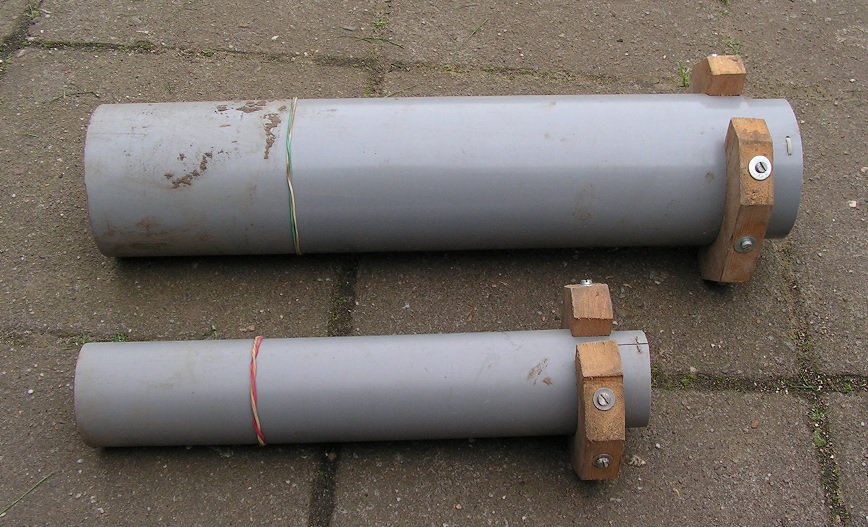
Replanting tubes of 10 cm (4 inch) or 6 cm (2 3/8 inch) diameter.

- Use the handles to push the outer replanting tube (until the rubber band) in the soil.
- The outer tube is about 10 centimeters (4 inch) in the garden soil.
- The inner tube is still on the garden soil (and therefore protrudes about 12.5 cm (5 inch) above the outer tube).

- Use the handles to pull the tubes carefully out of the soil.
- There are round planting holes in the garden soil.
- In the outer tubes there is garden earth from the planting hole.

- Unload the moist garden earth elsewhere in the garden;
- Put the fingers of both hands under the handles to grab the replanting tubes (inner and outer tube).
- Hold the replanting tube (inner and outer tube) a little above the ground.
- Use both thumbs to push the inner tube down; push the earth out of the outer tube.
.
B)# Replanting (replanting tube with inner tube)
Below is described how you can replant using a tube of 6 cm (2 3/8 inch) or 10 cm (4 inch). With text and photos.
When the garden soil is (too) dry, the root ball can fall apart during replanting. When needed, water the soil and let the water sink in the soil before replanting.
.
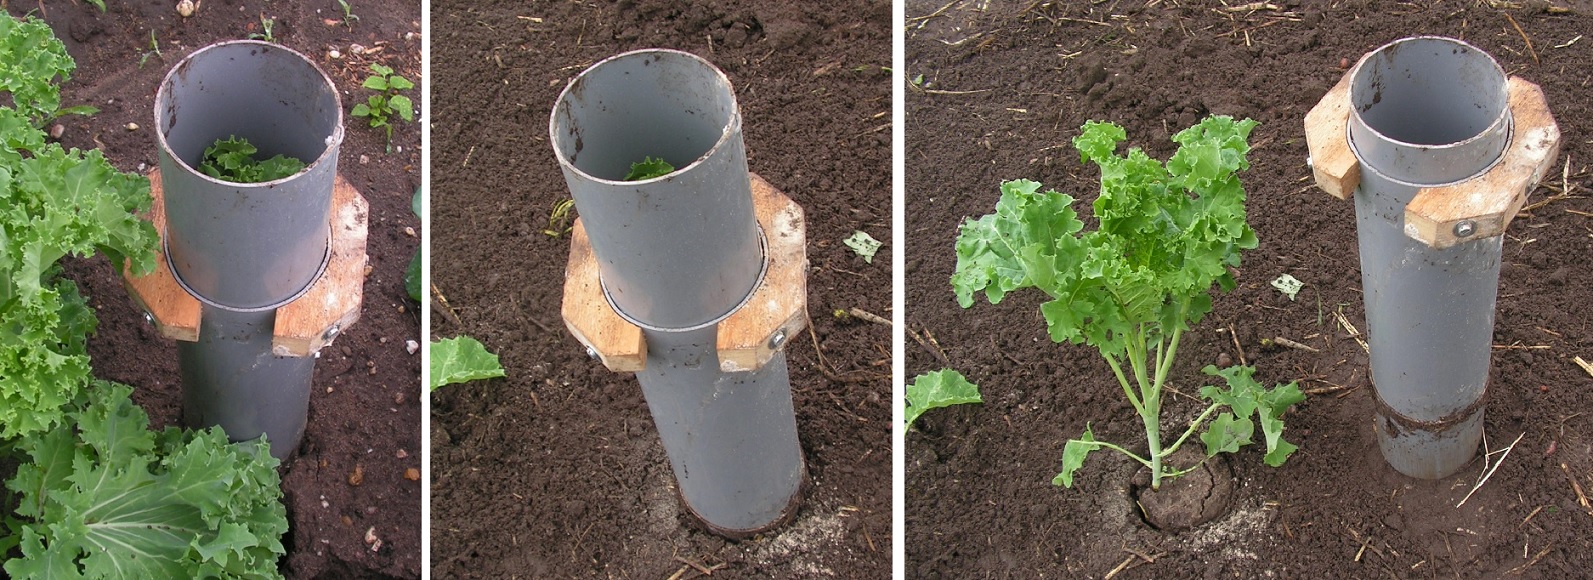
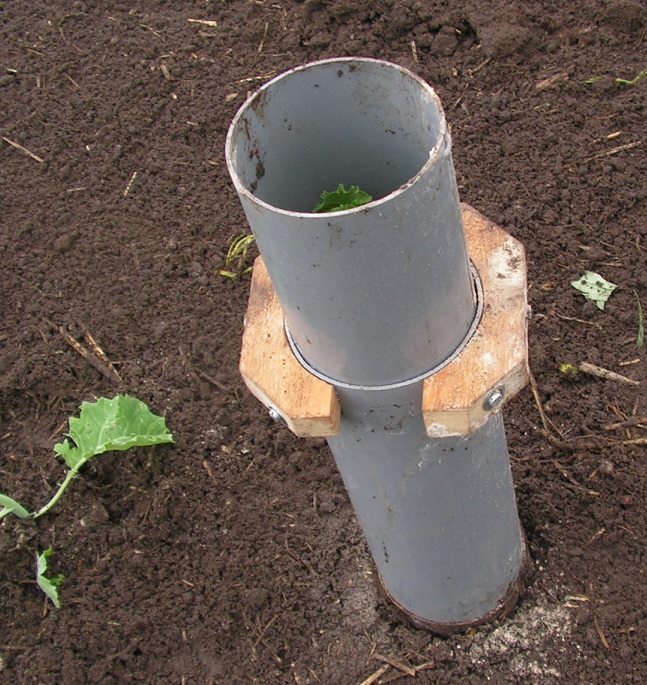
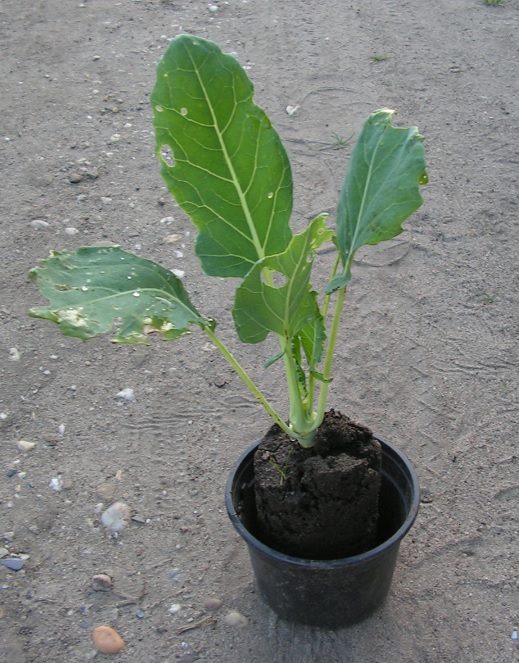
B1) Small cabbage plant, tubes diameter 6 cm (2 3/8 inch).
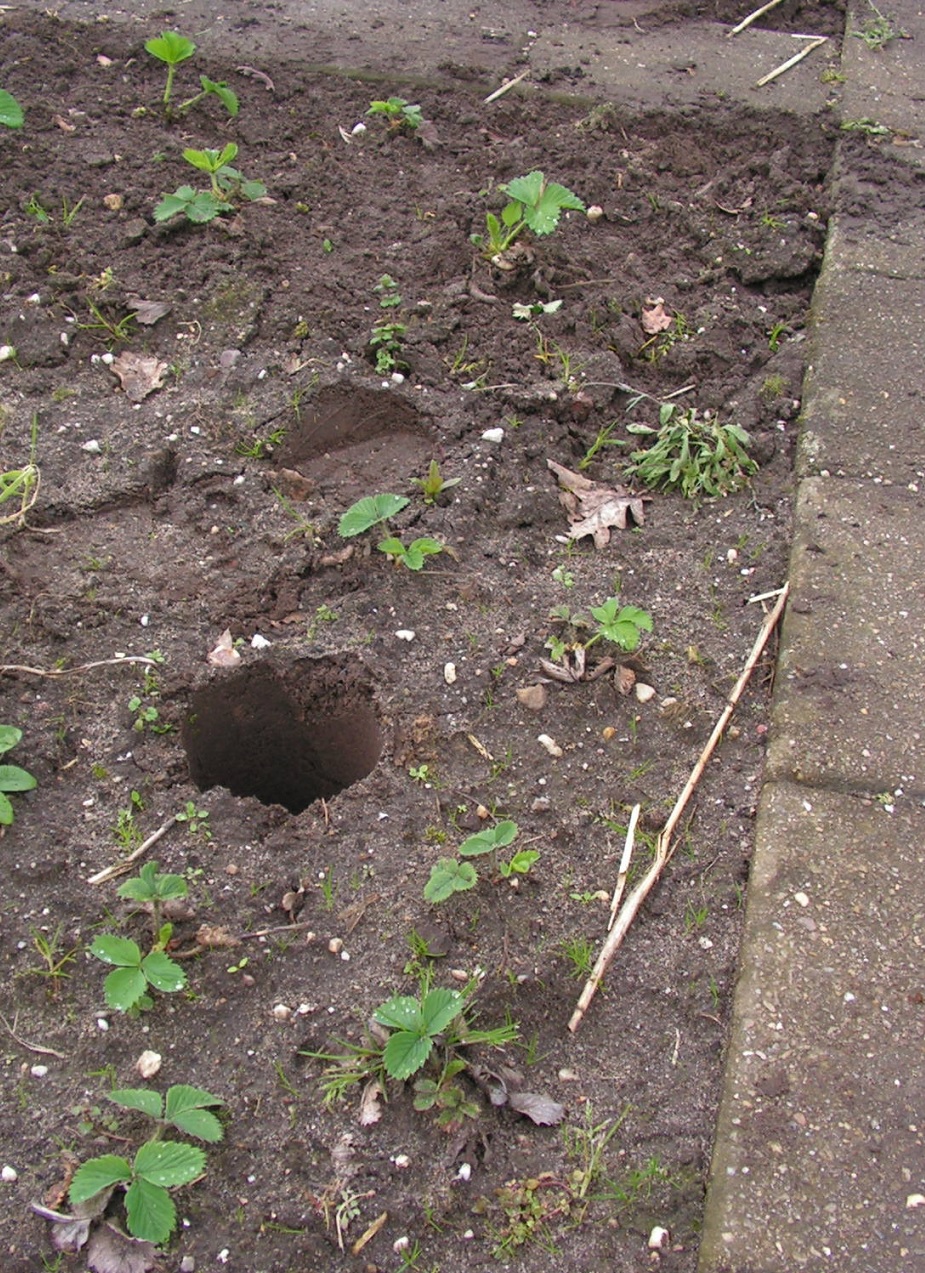
- Make a round planting hole at a new spot in the garden;
- Use replanting tubes or use a plant hole tube to do that.
- Scatter agricultural lime in the planting hole (helps against the plant disease “club root”).

- Select the plant that needs replanting.
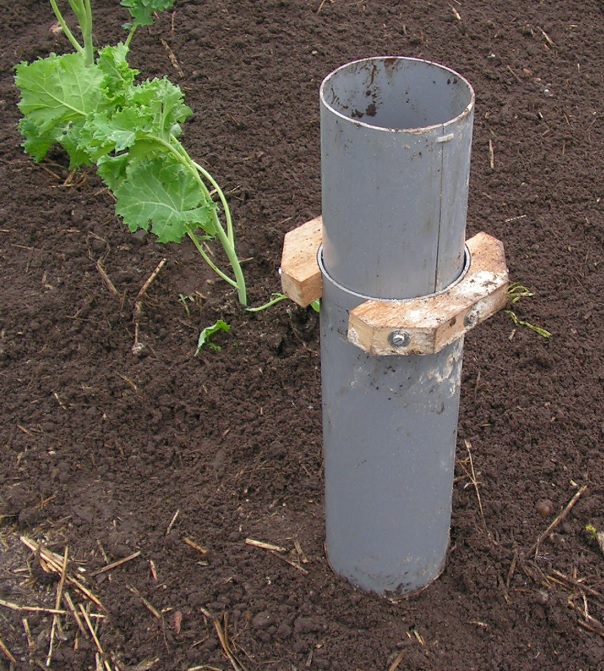
- Use one hand to push all leaves of the plant against the stem.
- Put the “loose” inner tube over the cabbage plant on the garden soil.
- Meanwhile guide and push the leaves and the stem of the plant into the tube.
- Put the outer tube over the inner tube.
- (you can also put both tubes “together” over the plant on the soil).
.
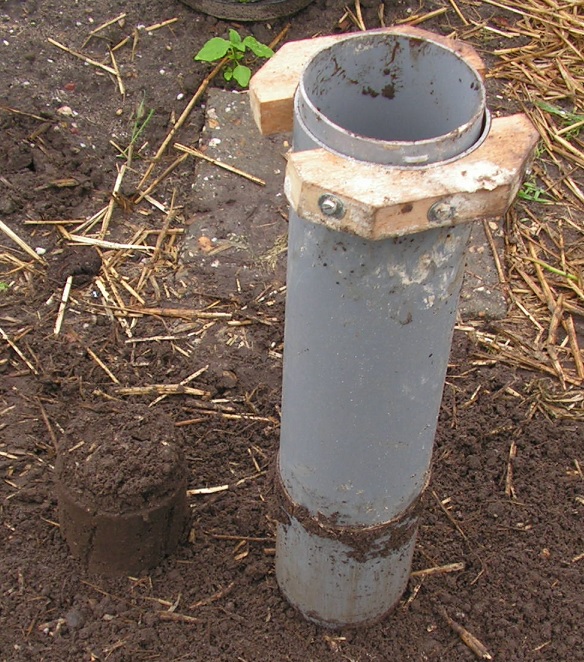
- Use the handles to push the outer replanting tube in the soil until the rubber band touches the soil.
- The outer tube is about 10 centimeters (4 inch) in the garden soil.
- The inner tube is on the garden soil (and protrudes about 12.5 cm (5 inch) above the outer tube).
- Use the handles to pull the outer tube out of the soil. The inner tube and the plant also go along.
- You end up with a round hole in the soil at the spot where the plant was growing before.

- Put the whole in the round planting hole at the new spot in the garden.
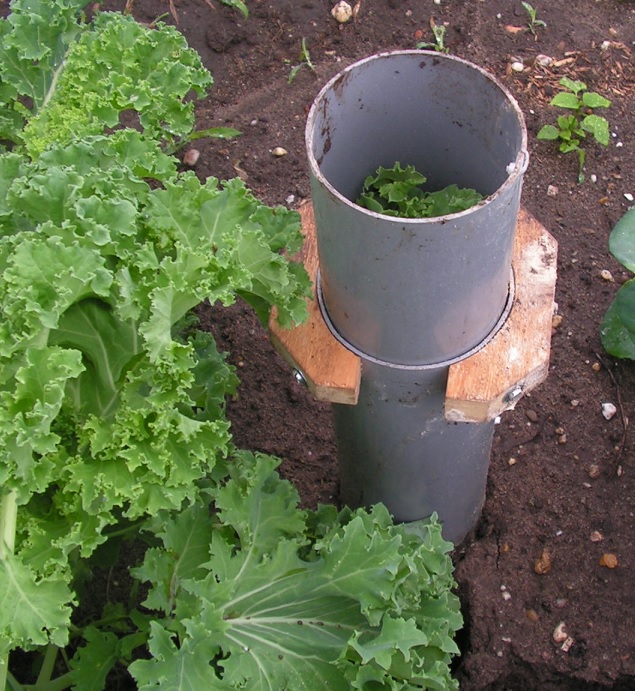
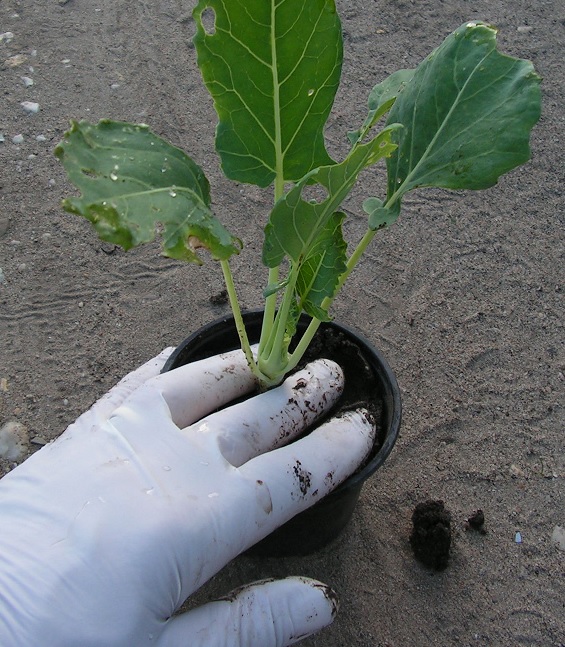
- Push the plant out of the replanting tubes, as follows;
- Put the fingers of both hands under the handles.
- Put both thumbs on top of the inner tube.
- Pull the outer tube out of the soil while your thumbs push on the inner tube.
- Lift the tubes from the plant.
.
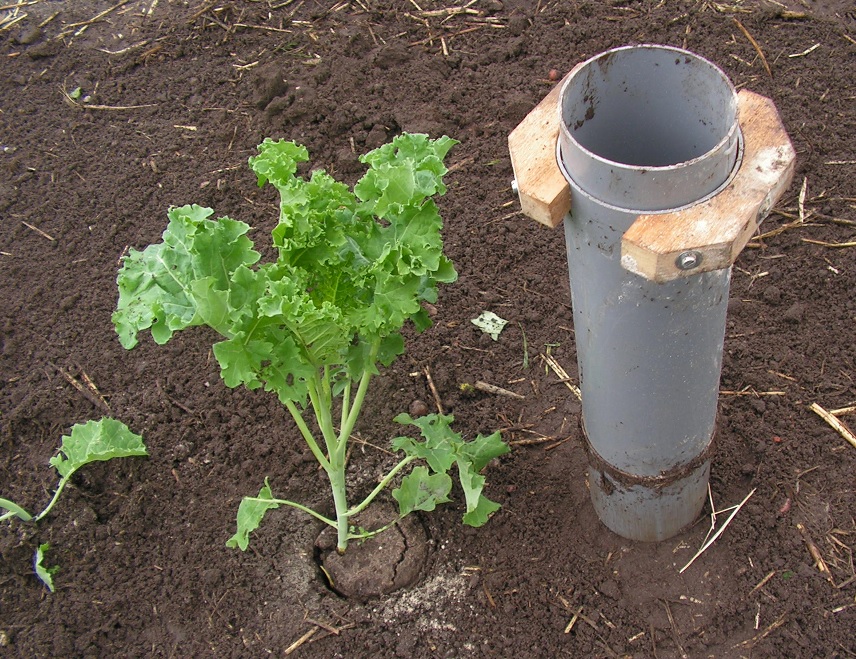
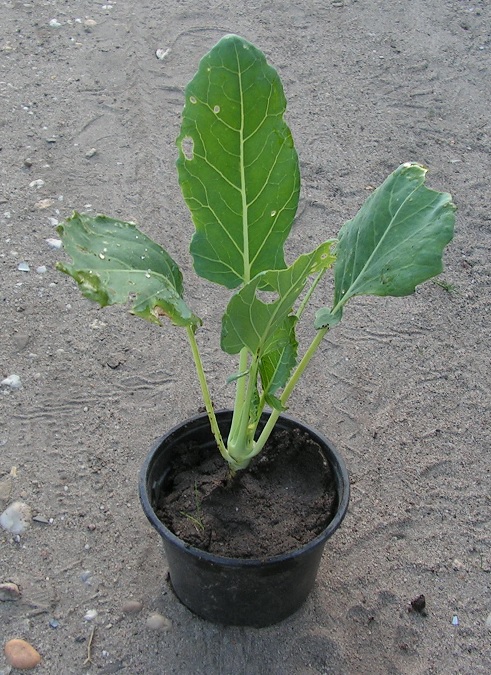
- The plant is now in the planting hole at the new spot in the garden soil.
- Use a watering can to water the plant and the soil after replanting. Garden earth will flow in the narrow clearance between garden soil and root ball.
- Or push garden earth against the root ball. Then water the plant and the soil.
.
B2) Big cabbage, tubes diameter 10 cm (4 inch).

- Make a planting hole at the desired spot in the garden.
- Unload the moist garden earth elsewhere in the garden;
- Use both thumbs to push the inner tube down; push the earth out of the outer tube.
- Drop the earth on the soil
- You can spread the earth in the garden.

- Scatter agricultural lime in the planting hole (helps against the plant disease “club root”).
- Select the plant that needs replanting.
- Use one hand to push all leaves of the plant against the stem.
- Put the “loose” inner tube over the cabbage plant on the garden soil.
- Meanwhile guide and push the leaves and the stem of the plant into the tube.
- Put the outer tube over the inner tube.
- (you can also put both tubes “together” over the plant on the soil).
.
- Use the handles to push the outer replanting tube in the soil (until the rubber band touches the soil).
- The outer tube is about 10 centimeters (4 inch) in the garden soil.
- The inner tube is on the garden soil (and protrudes about 12.5 cm (5 inch) above the outer tube).
- Use the handles to pull the outer tube out of the soil. The inner tube and the plant also go along.
- You end up with a round hole in the soil at the spot where the plant was growing before.
- Put the whole in the round planting hole at the new spot in the garden.
- Push the plant out of the replanting tubes, as follows;
- Put the fingers of both hands under the handles.
- Put both thumbs on top of the inner tube.
- Pull the outer tube out of the soil while your thumbs push on the inner tube.
- Lift the tubes from the plant.
.
- The plant is now in the planting hole at the new spot in the garden soil.
- Use a watering can to water the plant and the soil after replanting. Garden earth will flow in the narrow clearance between garden soil and root ball.
- Or push garden earth against the root ball. Then water the plant and the soil.
.
Replanting other (vegetable) plants:
You can replant all kind of plants using the tubes, for example Lettuce, Chicory, Strawberry, Beetroot and so on.


A spare Strawberry plant (arrow) has been replanted to an empty position in the row using the replanting tubes.
.
Leaves in a roll
Tom advised to put the leaves and stem in a paper roll before taking the plant out.
I tested this procedure, see below.
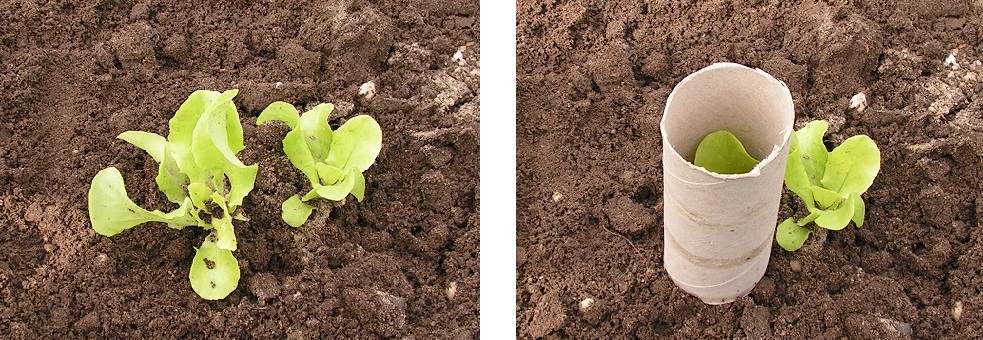

Photos show how to put an empty toilet paper roll around a lettuce plant. And how to remove the paper roll after replanting.
.
Replanting in a flower pot
After taking out, you can put the plant in a flower pot. Below a description with photos of the old design (with blow-out hose). But using the new model (inner tube and outer tube) goes well too.
Tube of 6 cm

- On this photo a replanting tube (old design with hose) with a plant in and an empty flower pot next to it.
- Blow the plant with root ball into the flower pot.
- The top of the root ball is 1 cm (0.5 inch) higher than the edge of the flower pot.
- Use fingers to press moist earth deeper in the flower pot.
The replanted cabbage plant in a flower pot.
.
C)# Making replanting tube with inner tube
Below photos and text about making replanting tubes new design (with inner tube).
C1) Making and fastening the handles
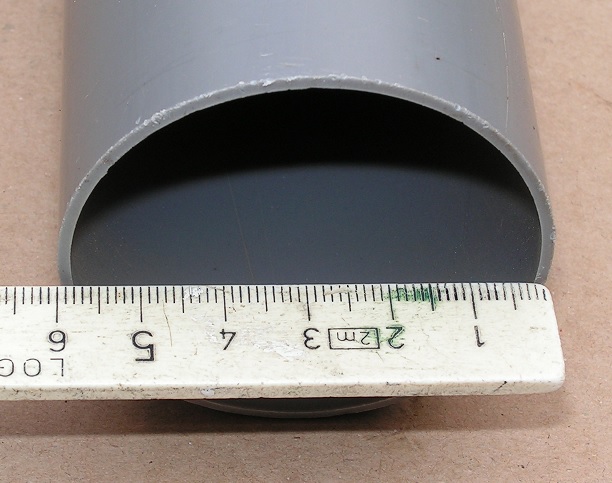
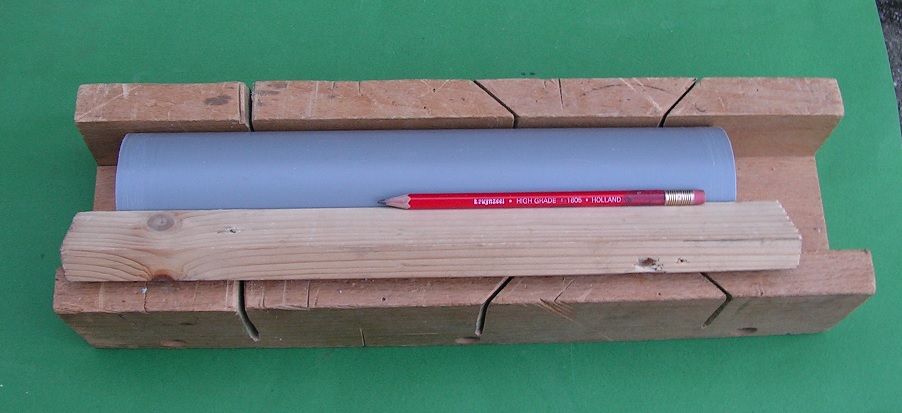
You need a tube (rainwater drainage tube). Diameter can be 6 cm, 8 cm or 10 cm.
The tube must be thin-walled. That’s easier when pushing in the garden soil.
Saw a piece of tube, length about 45 cm (1 ft 6 inch).
Start making the wooden handles. These handles must fit well around the tube. You can use the boards of this wine rack . Little chance that these boards fit well (accurate) around the tubes.
You better make the wooden handles your self. As follows;

- Use a wooden lath, width about 5 cm (2 inch), thickness about 2 cm (0.8 inch).
- Clamp the lath in a bench vice or a work bench.
- Hold (press) a small piece of tube on the lath, about 1 inch “overlapping”. Use a pencil to draw the contour of the tube on the lat.

- Clamp the lath in a bench vice or work bench.
- Saw the curve in the lath using a sharp jig-saw or fret-saw.
- Saw through the lath, a few cm (1.5 inch) next to the end of the curve.
- Use the same procedure to make 2 handles.
.
Remark (sturdy jigsaw):
A “normal” jigsaw breaks easily during use.

This jigsaw is wider, sturdier, “does not break” and can be purchased in a DIY store.
.
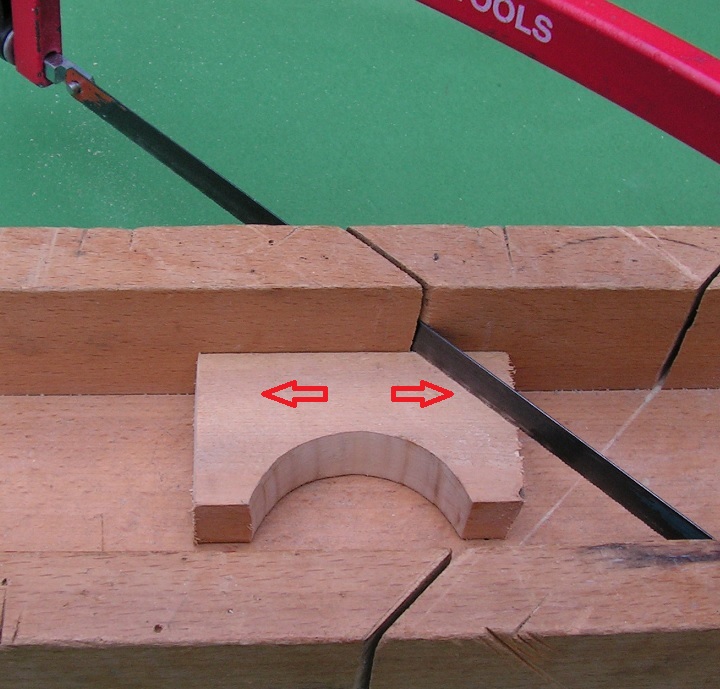
- Saw 2 oblique corners at each handle (red arrows).
- Use a hack saw and a mitre (miter) box to do this.


- Hit 3 hardened steel nails in each handle.
- Put the handle on a flat surface, with an oblique corner down.
- Hit the nail vertically into the wood.
- Repeat these steps at all 3 flat surfaces of the handle.
- Hit each nail deep in the wood; the nail point is visible at the other side of the wood.
(instead of hitting 3 nails, you can drill 3 holes)

- Use pincers to pull the nails out of the wood.
- You end up with 3 small holes in the handle.
(or you have drilled 3 holes)
Do the above steps at both handles.
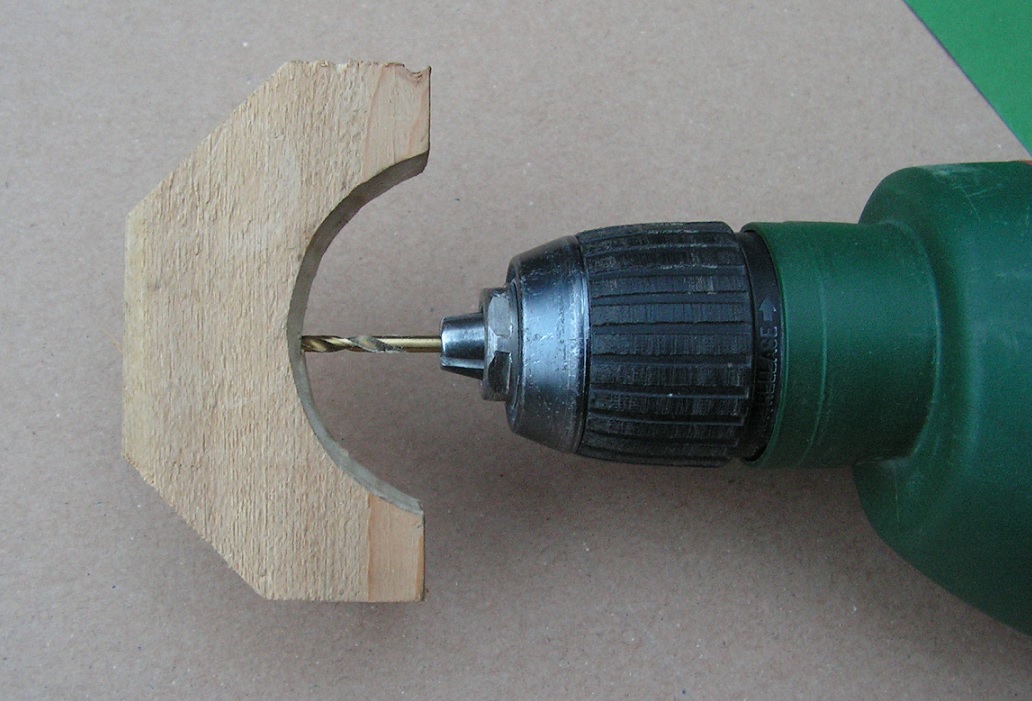

- Use a drill machine and a drill of 5 mm (1/5 inch) to enlarge the holes in each handle.

- Use the piece of tube (length about 45 cm (1 ft 6 inch).
- Put the tube on a flat surface (plate or board).
- Lay the wooden handle on the same surface against the tube.
- Put the drill (5 mm, 1/5 inch) in the central hole of the handle.
- Press the handle against the tube while drilling a hole in the tube.
- After drilling, remove the drill from the tube and the handle.

- Needed (for fixing the handle):
- One iron bolt (4 mm),
- One flat iron ring (4 mm),
- One sleeve nut (4 mm).
- A sleeve nut is a metal tube with 4 mm internal screw thread.
- A sleeve nut and screw are used when connecting door handle roses.
- These screws and nuts are for sale in DIY shops.
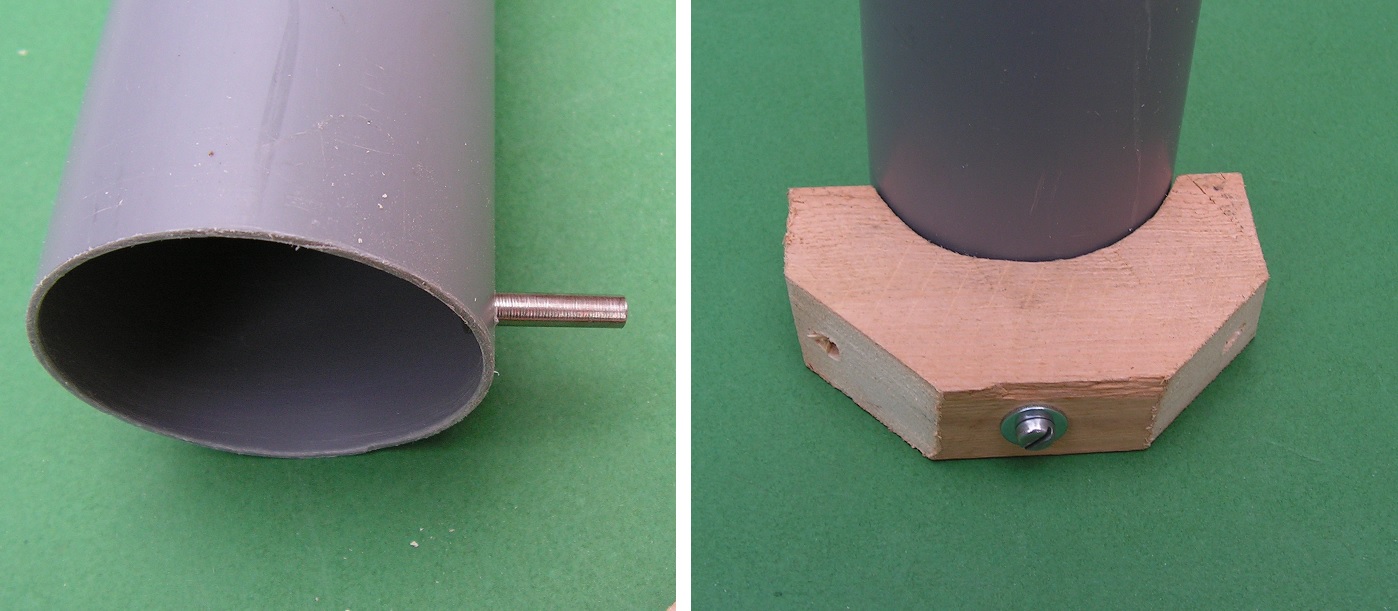
- Fasten one handle to the tube with one bolt and one sleeve nut;
- Put a sleeve nut from in to out in the hole of the tube.
- Push the sleeve nut in the central hole of the handle.
- Put one bolt with metal ring in the central hole of the handle.
- Screw the bolt in the sleeve nut.

- Make 2 more holes in the tube;
- Put the whole on a flat surface (plate or board).
- Put the drill in one “outer hole” of the handle and drill a hole in the tube.
- During drilling, push the handle against the tube.
- After drilling, remove the drill from the tube and the handle.
- Put the drill in the other “outer hole” of the handle and make a hole in the tube too (using the same procedure).
- You end up with 3 holes in the tube.
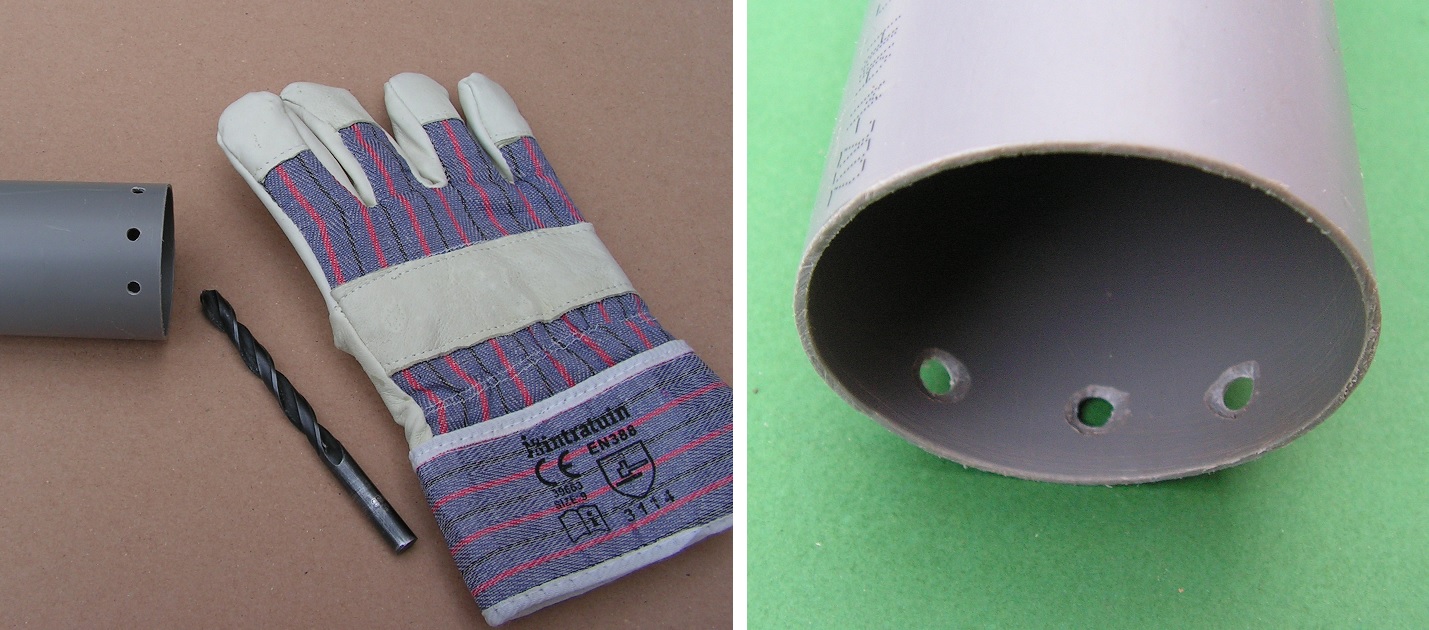
- Put on work gloves.
- Put a sharp (iron) drill of about 8 mm (1/3 inch) in a gloved hand or pliers.
- Turn the point of the in each hole at the inner side of the tube;
- This makes the hole at the inner side of the tube wider and \ / shaped.
- This means that the head of the sleeve nut does not protrude so far, later. So the inner tube slides easier.

- Fasten the wooden handle to the tube using 3 screws (sleeve nuts, rings and bolts).

- Use the same procedure to fasten the other wooden handle.
- You end up with 2 handles opposite to each other, near the end of the tube.
.
C2) Making the inner tube
During replanting, the plant plus root ball is pushed out by the inner tube. To do that well, the inner tube must be about 2.5 cm (1 inch) longer than the outer tube.
(When using an inner tube of the same length as the outer tube, pushing out the plant will go well, I think. I’ll investigate that later. For now I describe an inner tube that is longer than the outer tube).
The outer tube is 45 cm (1 ft 6 inch) long. The inner tube is 47.5 cm (1 ft 7 inch).
- Saw a new piece of tube, length about 47.5 cm (1 ft 7 inch).
.
The diameter of the inner tube is a little less than the outer tube; the inner tube fits well in the outer tube and can slide “free”.
I adapted the inner tube as follows;
- Put the tube on or in a mitre (miter) box.
- Push a wooden lath against the tube.
- Use a pencil to draw a line lengthwise on the tube.
- Turn the tube a little on (in) the mitre (miter) box.
- Draw a 2nd line lengthwise on the tube, about 13 mm (0.5 inch) further.
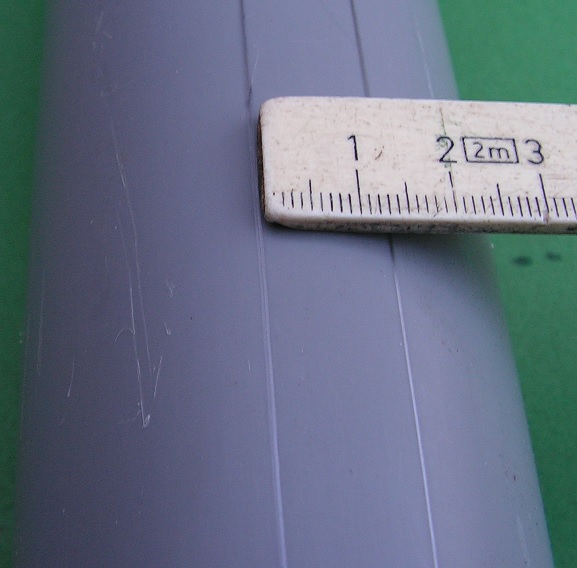
- The lengthwise lines are about 13 mm (1/2 inch) apart.

- Saw away the strip of PVC tube between the 2 lines;
- Put the tube in/on a mitre (miter) box.
- Use a sharp hack saw;
- Again and again saw in one line and in the other line.
- Near the end, saw carefully in the lines.

- You end up with a tube having a lengthwise “slot” of 13 mm (0.5 inch) wide.

- Use sand paper to polish the sides and to remove plastic flakes.

- Make small holes in the tube next to the lengthwise slot;
- Put a round piece of wood in the tube.
- Hammer a small nail in the tube (or drill a small hole).
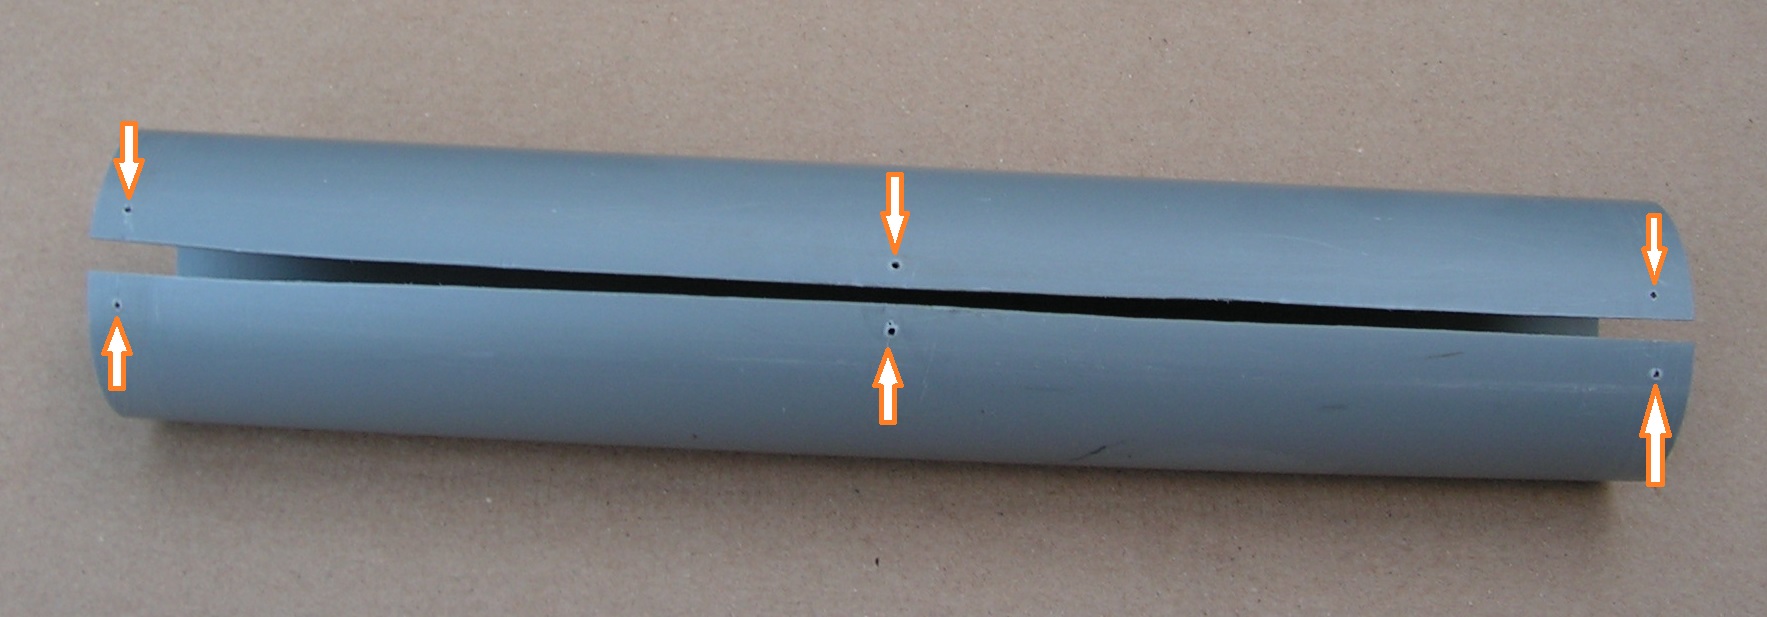
- Make 6 small holes in the tube; 2 near the middle and 2 near each end. See arrows.
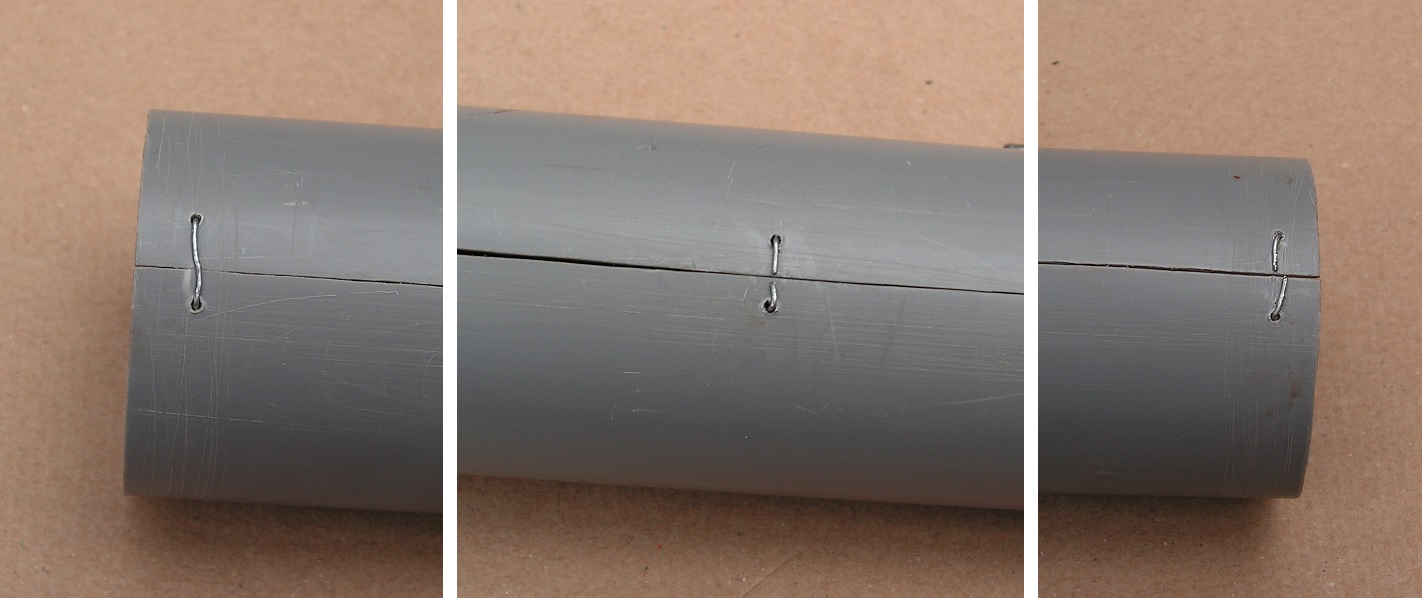
- Put pieces of thin iron wire through the joining small holes.
- Push the long ends of the tube together. Meanwhile bend the iron wire at the inside of the tube.
- After this, the long ends of the tubes are in close contact.
Or use thin tie-wraps to keep the long ends together;


- Push thin tie-wraps through the holes.
- Fasten the tie-wraps at the inner side of the tube.
- Cut loose ends from the tie-wraps.
.

Two different replanting tubes;
- At the left tube (6 cm, 2 3/8 inch), the inner tube has thin iron wires inside.
- At the right tube (10 cm, 4 inch), the inner tube has thin tie-wraps inside.
.
D)# Final remarks.
- The replanting tool with inner tube works well.
- You can make a planting hole in the soil using a replanting tube with inner tube or using a plant hole tube (see chapter First design (with hose)).
- During use, grains of sand (earth) get between the tubes. Now and then immerse the tubes in water to remove these grains.
- I haven’t found a similar tool on the internet yet.

3 thoughts on “41) Replanting vegetables using 2 plastic tubes”